
Quick Guide to Using CloudClinic: The Ultimate Tool for Revolutionizing Healthcare
Do you remember life before smartphones and the internet? The world was a different place. We had to go to the library to look up information, write letters to communicate with people, and wait in long queues to get things done. Some say it was a simpler time, but we know one thing for sure, healthcare was not as accessible as it is today.
There was nothing like social media, and certainly nothing like health tech apps. But the world is rapidly changing, and technology has become a crucial part of our lives. It’s amazing how far we’ve come in terms of using technology to improve our lives, and CloudClinic is one of the many examples of how technology is changing the way we approach healthcare.
If you don’t already know, CloudClinic is a health technology application designed to help patients and doctors connect, consult, and manage health records securely. And what’s more? CloudClinic goes beyond telemedicine as it is a full-stack platform that provides a hybrid solution that leverages partnerships with pharmacies, medical labs, and hospitals across Nigeria, ultimately enhancing the patient experience and enabling healthcare providers to deliver the highest quality care.
CloudClinic is a game-changer in the healthcare industry, and it has numerous features that make it convenient and easy to use. In this quick guide, we’ll walk you through the ins and outs of the My CloudClinic app, ensuring you get the most out of this game-changing platform.
Quick Guide for Patient Users
If you’re a patient who’s new to using CloudClinic, you’re in for a treat! Our app is designed to make healthcare more convenient for you, and there are many features that you’ll find useful. Whether you’re looking to book an appointment, manage your health records, or consult with a doctor virtually, we’ve got you covered. So, let’s dive in!
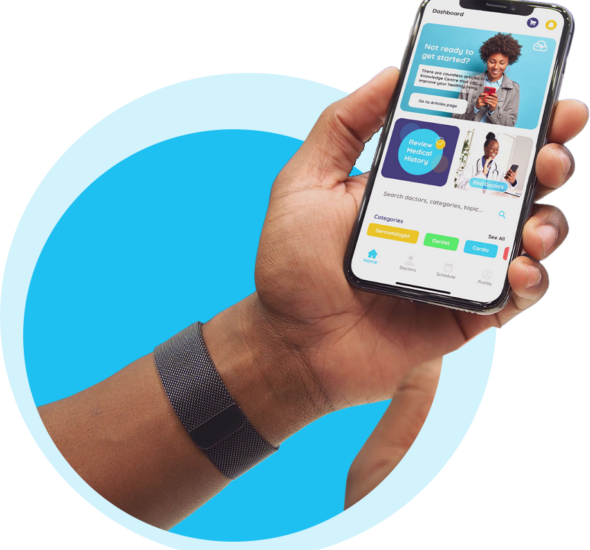
- Download and register: The first step is to download the CloudClinic app from the Google Play Store or App Store. Once you have downloaded the app, start your registration process by clicking on the sign up button. As soon as this is done, you’ll be prompted to head straight to your email and verify your account.
- Set up your profile: After registration, you need to set up your profile by adding your personal information, medical history, and any ongoing medication.
- Book an appointment: Once your profile is set up, viola! all the features are now available for you to explore. For appointment bookings, you can choose from our rich array of specialist doctors available on the app and book an appointment for a virtual consultation. Interestingly, you can choose a doctor that speaks your preferred language.
- Virtual Consultation: At the scheduled time, you will be notified of your appointment, and the doctor will connect with you virtually through the app. You can discuss your symptoms, and the doctor will provide a diagnosis and prescribe medication if necessary.
- Manage health records: You can also manage your health records through the app, including test results, doctor visits, and medication details. The app allows you to keep your health records organized in one place. More over, you have complete control over whom you choose to give access to your medical records.
- Access to healthcare providers: After your consultation, if your doctor prescribes some medication or requests a laboratory investigation, our proximity location feature can connect you with the healthcare provider nearest to you, whether it’s a hospital, medical lab, or pharmacy. However, in the case where you’re unable to visit the facility, CloudClinic offers a home care service, which means you can still receive the care you need without leaving your home.

Quick Guide for Doctors
If you’re a doctor who’s new to using CloudClinic, keep reading as we’ll show you how to take advantage of all the app’s features and provide personalized care to your patients.
- Download and register: First off, download the My CloudClinic app from the Google Play Store or App Store and register as a doctor by providing your details.
- Set up your profile: After registration and verification of your account, you’ll need to set up your profile by adding your specialization, experience, and consultation fees.
- Accept appointments: Once your profile is set up, you can accept appointments from patients. The app notifies you once a patient books and appointment. You are at liberty to either accept, reschedule or out-rightly decline any appointment request depending on your availability. Note, however, that whatever action you choose to take will affect your ranking on the app.
- Virtual consultation: You can connect with patients virtually through the app at the scheduled time. During the consultation, you can clerk, diagnose the patient’s symptoms and prescribe medication if necessary.
- Manage patient records: You can manage patient records through the app, including diagnosis, medication prescribed, and follow-up appointments. However, these can only be done if the patient gives you access to their record.
- Share your knowledge: You are the expert, we trust you. Therefore, we designed the Medical Knowledge Center (MKC) for you to share your medical knowledge for the sake of your patients. Prevention they say is better than cure. What do your patients need to know? What should your patients do or not do? It’s all up to you, doc! Note, the more you write, the more popular you get, and the more patient reach you acquire.

Ready to Revolutionize Your Healthcare Experience?
If you haven’t already, download the CloudClinic app from the Google Play Store or App Store and experience the future of healthcare today. Don’t forget to join our WhatsApp community to stay updated on the latest features, tips, and news from CloudClinic. Stay Happy! Stay Healthy!
Got any questions or concerns? Write to us in the comment box below. We promise we won’t leave you hanging! Our team is always here to support you and make your experience with CloudClinic as seamless as possible.